Introduction to Class-A
Class-A (or 'Strak') is a term used in specifically in automotive design. It describes the final production surface data for the aesthetic parts of the car.
The term 'Class A' is often misunderstood, but it's generally seen as the 'Holy Grail' of surface modelling. This is because as it achieves the highest surface quality levels, and it demands a high level of automotive design knowledge as well as surface modelling skills.
Class A represents the 'craftwork' end of the design process. Creating the main surface shapes to describe the vehicle is the primary design activity. But the painstaking, detailed craftsmanship of perfecting those surfaces, designing flanges and panel gaps is what guarantees that a beautiful design turns into a beautiful manufactured product.
What is Class-A?
The Class-A modelling process typically starts with a fully developed design, either as a scanned clay model or an Alias model. Because the design isn't changing, the modeller has the time to build surfaces to the highest quality standards, ready for production.
The challenge for Class-A is to combine the need for:
- Aesthetic Quality - Continuity and Highlights
- Engineering Requirements - Flanges and Fit
- Production Requirements - Modelling Tolerances
Aesthetic Quality required for Class-A
Baseline Requirements: G0, G1, G2
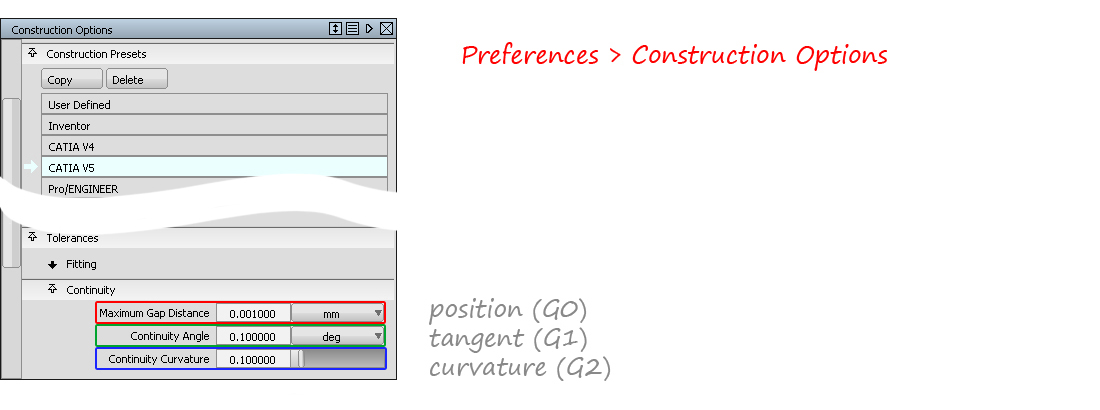
The baseline requirements for Class-A are the same as for production-quality surfacing in all industries: to build to tight tolerances for G0, G1 and G2 continuity.
In Alias this is achieved by using the right Construction Tolerances before you start modelling, for example 'Catia V5'.

And by checking that these have been achieved using one or more of the following tools:
- Surface Edit → Stitch (to check the whole model for G0 gaps)
- Evaluation → Surface Continuity ( to check individual boundaries for G0, G1, G2)
- Evaluation → Model Check (to check the whole model for G0, G1, G2, and duplicates, small edges etc.)
It's important to note that there are no absolute rules for tolerances or continuity levels. It is part of the skill and knowledge of the Class A modeller to be able to judge which settings will result in the right quality in the production car.
G3 Continuity
Class-A aesthetic quality is generally understood as being 'perfect' highlight reflections. G3 Continuity across the surface patches is often used to achieve this. G3 continuity can be achieved with the following workflows and tools in Alias:
- Direct Modelling of the surface CVs combined with interactive evaluation of the continuity.
- Object Edit → Align
- Surface Tools: Freeform Blend, Profile Blend, Surface Fillet, Symmetric Fillet.
- Blend Curves

Evaluating Highlights
'Perfect Highlights' can't be judged by a single evaluation, instead a combination of methods is used:
- Continuity at Boundaries : Evaluation → Surface Continuity
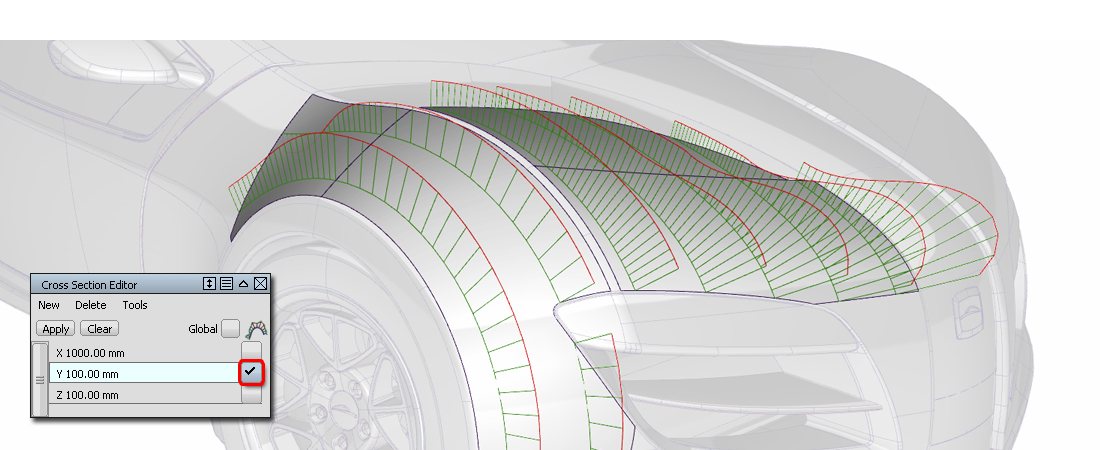
- Continuity across boundaries : Locators → Curve Curvature and Windows → Cross-Section Editor
- Continuity Flow: Diagnostic Shading → Iso-Angle and Diagnostic Shading → Light Tunnel.
- Highlight Flow: Diagnostic Shading → Saddle Lines
- Surface Quality: Diagnostic Shading → Curvature Evaluation

Engineering Requirements for Class-A
These are typically defined by an automotive company, with detailed standards for each element of the design.
For example:
- Tolerances specific to A- surfaces, B-surfaces, C-surfaces etc.
- Tolerances specific for exterior surfaces, interiors (with and without grain for example).
- Tolerances specific for main blends, smaller fillets and detail fillets.
- Split Lines, Flanges and Panel gaps
It's not possible to give a generalised set of standards here, as this knowledge is part of the profession of Technical Surfacing and the proprietary expertise of each company, and so needs to be learned within the industry.
The Key to Successful Class-A Modelling
"The layout of the surface data is the key to Class A modelling." (Barry Kimball)
This means that the flow of CVs and Hulls and the flow of surface patches across the main surfaces and features of the car is the most important consideration for achieving Class A quality surface data.
This is the intention of the Golden Rules, to set out the right discipline for controlling surface quality. In particular:
- Bezier surfaces (for internal continuity/smoothness)
- G2/G3 continuity between surface patches
- Good CV Layout
- Working to the correct tolerances.
Reverse Engineering
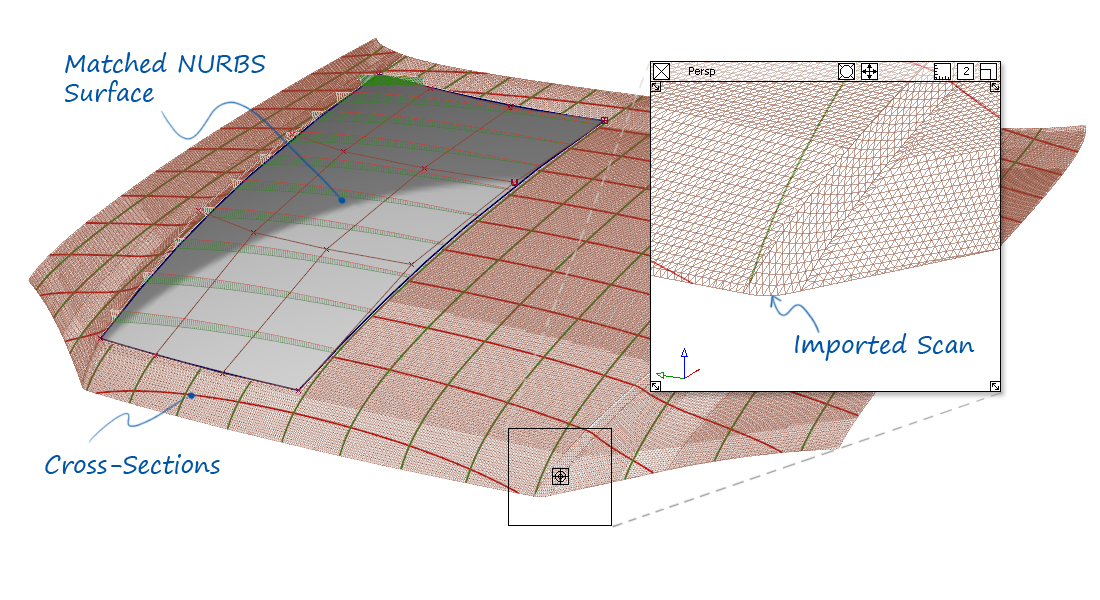
Reverse Engineering is the process where a physical model (typically a clay) is scanned, and then rebuilt as a NURBS model.

The modeller will be given a tolerance by which the NURBS data must match the scan. However, scan data will always have some imperfection, or 'noise', and there also may be imperfections in the clay model.
So the skill of the Reverse Engineer is to maintain the exact design character of the scan, whilst rejecting unintended imperfections.
When is Class-A Applied?
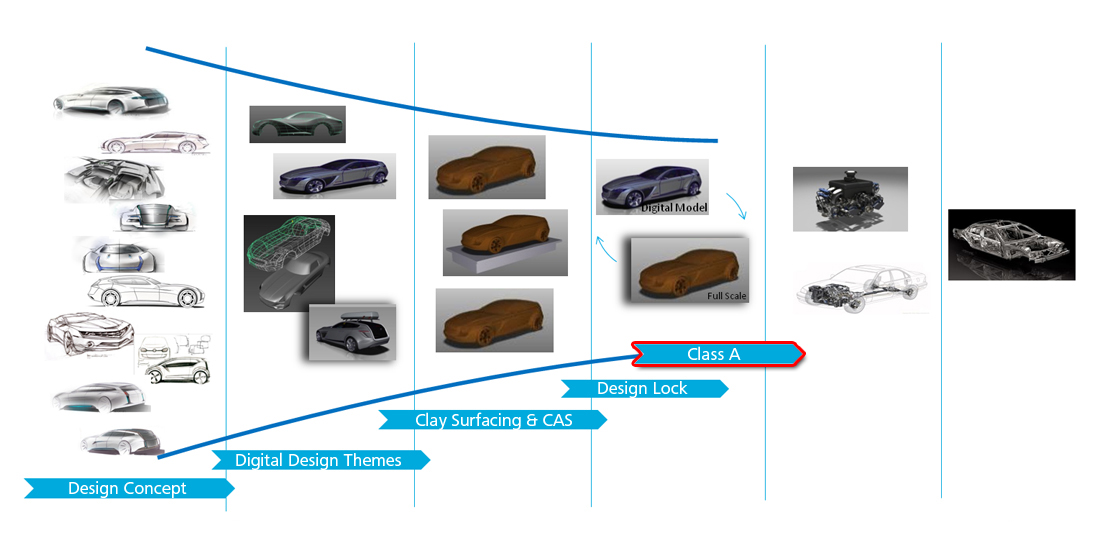
Class-A modelling is slow and methodical. Therefore it is used on the final model iteration, once the design has been 'locked'.
During Concept Modelling, the design changes are too rapid for strict Class-A standards to be applied. However, if Class-A principles are applied then the handover of data to Class-A modellers will be more effective.

